Editing Surveys
In this article
- Editing Delighted Surveys is — in a word — intuitive!
- A. Question-level editing, logic & page breaks.
- B. Survey-level naming, branding, auto-advance, welcome & thank you pages.
- C. Finalizing by previewing, collaborating, publishing & sending.
- Editing Published vs. Draft surveys.
- Deleting questions, welcome & thank you messages
Suggested next articles: Branding Surveys and Adding Logic to Questions.
Editing Delighted Surveys is — in a word — intuitive!
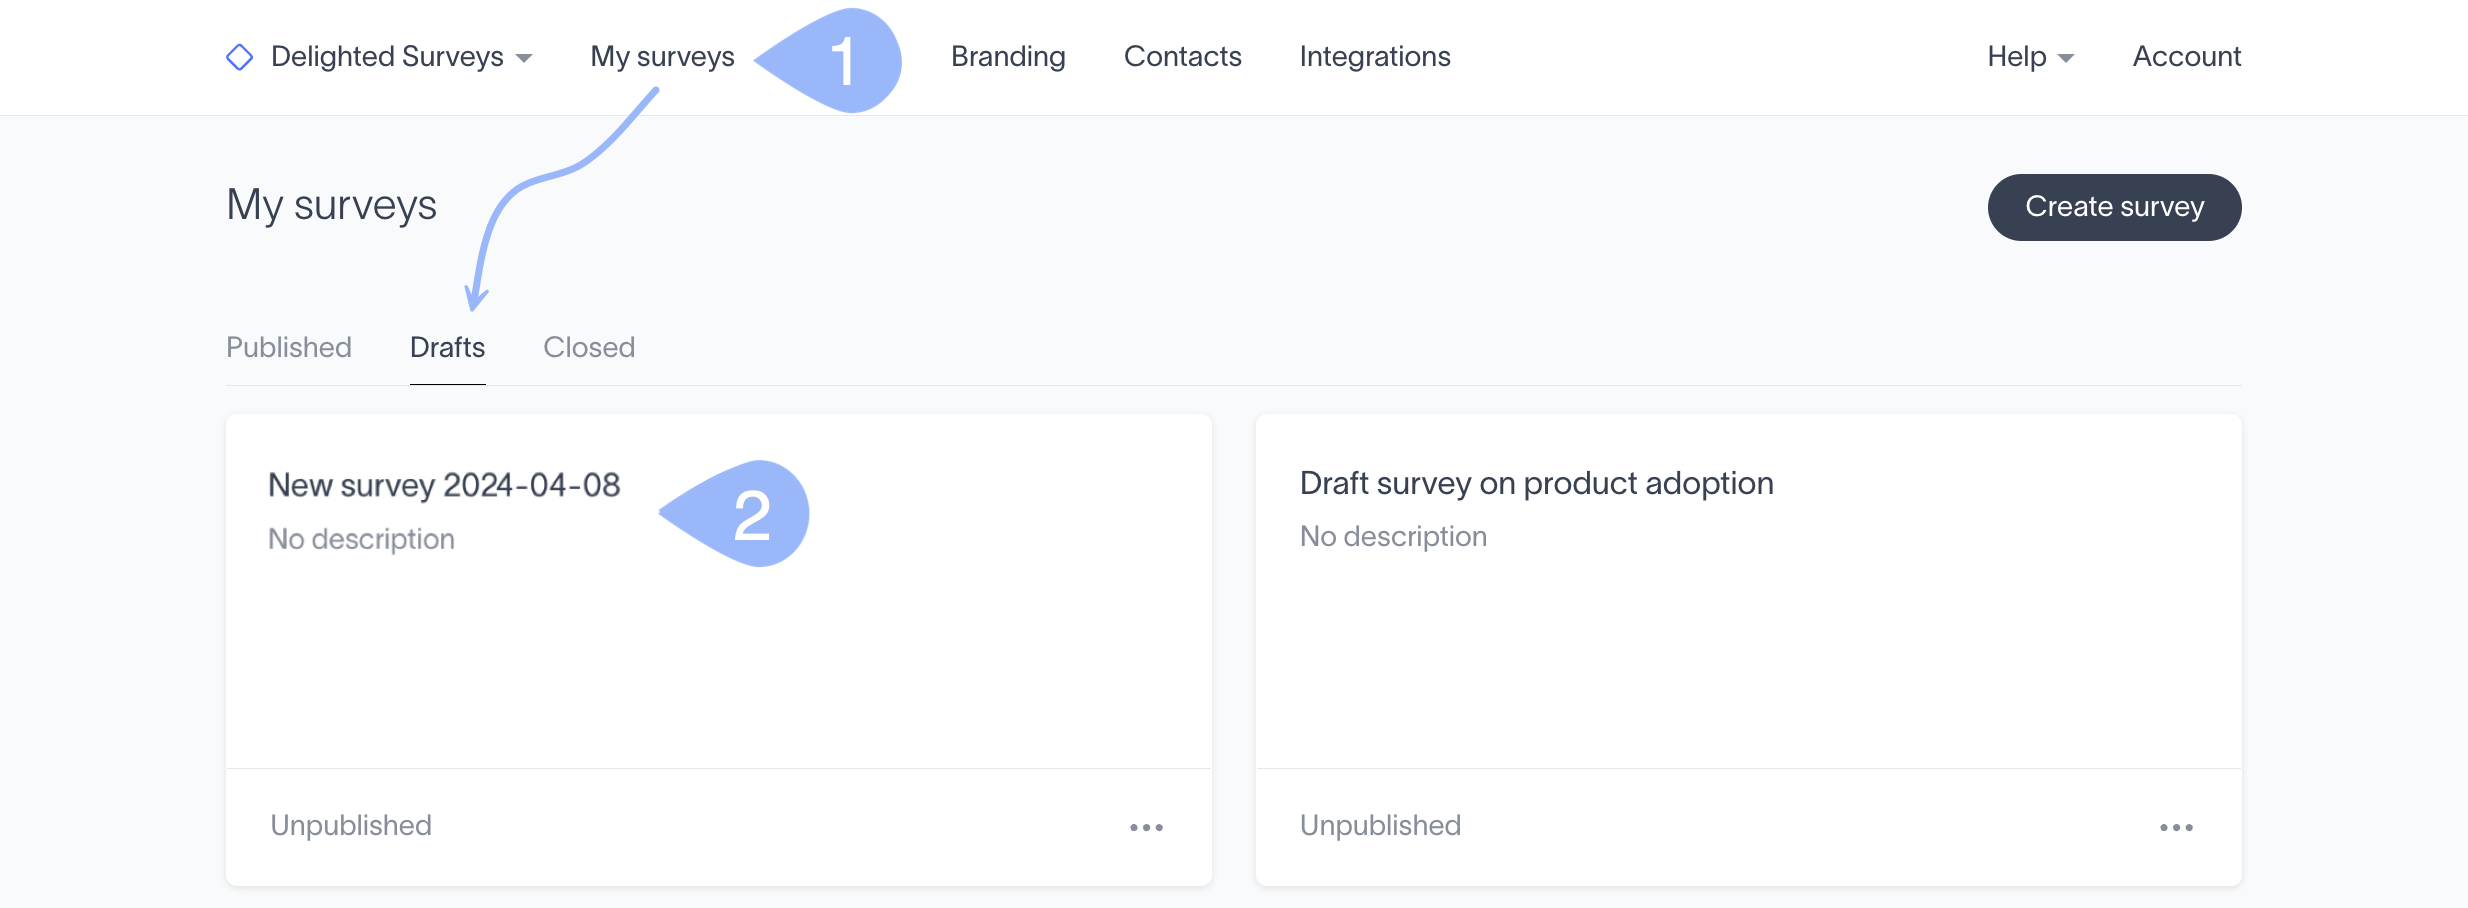
Make all the changes you wish to your unpublished surveys — which are stored under the Drafts tab. Fine-tune every detail to your liking.

-
What about Published surveys?
While editing options are somewhat restricted for Published and Closed surveys, there are eight major adjustments that can always be made. See Editing Published vs. Draft surveys for details.
To start editing:
There are more than a dozen actions to take from your survey's editing page. We'll break it all down in three related sections:
-
A. Question-level editing, logic & page breaks
B. Survey-level naming, branding, auto-advance, welcome & thank you pages
C. Finalizing by previewing, collaborating, publishing & sending
A. Question-level editing, logic & page breaks
| 1 | Edit question text and answer choices |
| 2 | Change question settings, formats, and scale points |
| 3 | Add & move questions up/down |
| 4 | Remove & add page breaks |
| 5 | Add 'conditional' logic to questions |

B. Survey-level naming, branding, auto-advance, welcome & thank you pages

C. Finalize by previewing, collaborating, publishing & sending
See our Help Center articles for details on these topics (click the links!).
| 11 | Preview your survey |
| 12 | Collaborate on surveys |
| 13 | Comment on surveys |
| 14 | Publish and share surveys — via Link & Web |
| 15 | Get help |

1. Edit question text and answer choices
Editing the wording of a question
To edit the wording of a question or to fix a spelling error:
- 1
-
Tap the "editing pencil" → (or simply click on the question)
- 2
- Click inside the question text box → and make changes to your text
- 3
- Click "Save question"
-


Edit scale point labels
To rewrite your scale point labels:
- 1
-
Tap the "editing pencil" → (or click on your question)
- 2
- Select a label that needs changing
- 3
- Enter the new label
- 4
- Click "Save question"
-


Edit answer choice text
To edit or reenter an answer choice:
- 1
-
Tap the "editing pencil" → (or simply click the question)
- 2
- Click the "editing pencil" → and delete the old answer
- 3
- Enter the new answer → and click "Add"
- 4
- Click "Save"
-


Delete answer choices
To delete answer choices:
- 1
-
Tap the "editing pencil" → (or just click your question)
- 2
- Tap the "trash can" icon → seen to the right of your target answer choice
- 3
- Click "Save question" → found below the question
-


2. Change question settings, formats, and scale points
Question settings are optional and vary based on the question format you've selected.
| Randomize order of options | Respondents in a rush may favor the first or last items in a list. To reduce this bias, randomize your options |
| Include "None of the above" option | This choice will be placed at the bottom of your list and will deselect any previously selected answer choices |
| Include "Other" with open text field | The "Other" option will be placed below your other answer choices (and above the "None of the above" if you add it), and will expand to display a text box when selected |
| Allow multiple selections | This setting turns a multiple choice question into a multiple selection question, where several choices can be picked from a list |
| Add descriptive text | Descriptive text will display as a subtitle below your question when using the text question format |
To add or change your question settings:
- 1
- Tap the "editing pencil" → (or click a question)
- 2
- Click any option to turn the setting on → and off
- 3
- Click "Save question"
-


Switch formats
To change your format; for example, from a Numeric scale to a Graphic scale:
- 1
-
Tap the "editing pencil" → (or just click your question)
- 2
- Click open the "Format menu"
- 3
- Pick a new format style from the list → and modify as needed
- 4
- Click "Save question"
-


3. Add & move questions up/down
To add a new question to your survey:
Move questions up/down
Often, you'll need to move a question up (or down) in the survey flow. Easily done!
To move a question up or down:
- 1
-
Open your survey editing page
- 2
- Hover over any question → and reveal the "move arrows"
- 3
- Tap the "up" or "down" arrows to reposition the selected question
-


-
What if the move arrows don't appear?
If the up or down arrow doesn't highlight, the question cannot be moved in that direction. For example:
- You can't move the first question up
- You can't move the last question down
- You can't move a question contingent on conditional logic above the question where the logic is defined. (See 5. Add 'branching' or 'conditional' logic.)
4. Remove & add page breaks
Page breaks are added automatically with every question you create, directing your survey to display a single question at a time.
Removing page breaks lets you group two, three, or more questions together on a single page.

Toggle the "REMOVE PAGE BREAK" and "ADD PAGE BREAK" lines to group questions or to break them apart.
| A |  |
Click "REMOVE PAGE BREAK" to group multiple questions onto a single page |
| B |  |
Click "ADD PAGE BREAK" to break multiple question pages out into individual questions |
A. REMOVE PAGE BREAK
To merge two (or more) questions into a single page:
- 1
- Hover over and click — REMOVE PAGE BREAK —
-

- 2
- Notice that the toggle changes to — ADD PAGE BREAK —
-

- 3
- Click Preview to see how your pages look when questions are grouped together!


B. ADD PAGE BREAK
To break out a question onto a separate page:
- 1
- Hover over and click — ADD PAGE BREAK —
-

- 2
- Notice that the toggle changes back to — REMOVE PAGE BREAK —
-

- 3
- Click Preview to see how your pages look as separate questions!


5. Add 'branching' or 'conditional' logic
Logic lets you display a 'conditional' question to respondents based on their answer to a previous question.
For example, following a 5 star or CSAT question, you can:
- Show unhappy respondents (1-3) a follow-up text question
- Redirect satisfied respondents (4-5) to the Thank you message — or show them a different follow-up question

-
Read Adding Branch Logic to Questions for details.
7. Adjust survey settings — name, description, auto-advance
Survey settings let you adjust the:
| A | Survey name |
| B | Survey description |
| C | Auto-advance questions (disable & enable) |

Settings can be changed from two places — from Survey index card (as marked here) or from the survey's editing page (as shown in the next set of steps).

A. Survey name
Chances are, you’ll want to rename your survey, perhaps more than once! There are two things to remember about a Surveys' name:
| A | Survey takers will not see the name — it's for internal use |
| B | Each survey will start with a default name, which is the date the survey was created — ex. "New survey 2024-07-05" |
To rename a survey and add a description from the Survey editing page:
- 1
- Open the survey from its survey card
- 2
- Select the "Survey name menu" → found at the top of the page
- 3
- Pick "Settings"
-

- 4
-
Select the "Survey name" box and enter the new name → (ex. “Museum Gift Shop Survey”)
-


B. Survey description
To add an optional description:
- Click the "Survey description" box
- 6
- Enter an optional description → (ex. “Q4 Responses”)
- 7
- Click "Save"
-


7.5 Disabling & enabling auto-advance
Auto-advance is the default setting, allowing respondents to progress quickly from question to question without clicking the "Next" button.
| Auto-advance works with every question type except: |
| Open text questions |
| Multiple select questions |
| Multiple choice questions where the respondent chooses "Other" |
To disable/enable the auto-advance setting:
- 1
- Open your survey editing page
- 2
- Click the survey name at the top of the page → and choose "Settings'
- 3
- Toggle the auto-advance option to "off"
- 4
- Choose "Save" → to enact the setting
-

- 5
- Click the auto-advance toggle to "on" to reverse the process
- 6
- Select "Save"

-
Disable and the auto-advance from the Survey index card You can disable/enable auto-advance by clicking "Settings" from the three dots menu in the corner of any Survey index card and completing the above steps.
-

8. Add & edit a welcome message
The optional welcome message can personalize your survey, give survey takers context, and help improve response rates.
To add a welcome message:
- 1
- Click "Add a welcome message" at the top of the survey flow
- 2
- Enter your text → (ex. "Please take our brief survey!")
- 3
- Click "Save message"
- 4
- Click the "editing pencil" icon to make corrections
-


9. Modify a default thank you message & add a link
A default thank you message appears at the end of each survey which reads, “Thank you for your participation.” It’s quite easy to replace this default with a message of your own.
To change your thank you message:
- 1
- Click "Add a thank you message" → located at the bottom of the editing page
- 2
- Alter the text in the "Add your message here" box → (ex. “Thank you for completing our survey!”)
- 3
- Select "Save message"
- 4
- Click the "editing pencil" to make subsequent corrections
-


Adding a link
Consider referring respondents to your website or another relevant location by adding a link to your thank you message.
To add your link to a thank you message:
- 1
-
Tap the "editing pencil" → (or just click on the "Thank you message" card)
- 2
- Scroll down and click "Optional outgoing link URL"
- 3
- Enter your URL → (ex. "https://surveys-help.delighted.com/")
- 4
- Enter your link text in the second box → (ex. “Click to learn more!”)
- 5
- Click "Save message"
- 6
- Click the "editing pencil" to make subsequent corrections
-


10. Deleting questions, welcome & thank you messages
To delete questions, welcome, and thank you messages:
- 1
-
Open your survey's editing page
- 2
- Hover over any question, welcome, or thank you message card
- 3
- Tap the "trash can"
- 4
- Click "Yes, delete question" → (or "Confirm" for welcome and thank you messages)
-


Editing Published vs. Draft surveys
When you reopen a survey from the Surveys index, if your target survey is a . . .
| "Draft" (Unpublished) survey | You will be wooshed to the survey editing page where you can take all of the actions explained in our Editing Surveys article |
| "Published" or "Closed" survey | You will be taken to your live Results page first → where you must click "Edit survey" to reopen the survey editing page as seen in the below image. Albeit, eight editing options will still be available |

Eight things you can change in published surveys

| 8 | Change Auto-advance question settings |

To edit a published survey:
- 1
- Open any "Published" or "Closed" survey
- 2
- Click "Edit survey" to open the editing page
- 3
- Make your changes as outlined in the above list
-


Your survey will be locked as soon as it has been published, you will not be able to:
- Add or delete questions
- Add or delete scale points or answer choices
- Change the labels in an existing question
- Reorder the survey flow
- Change branching logic statements
- Add or remove page breaks
Locking these elements keeps your results accurate, valid, and reliable.
